|
TableTop PulseSealers are only available with SingleHead sealing feature. Larger PulseSealers, such as ShadeSealer machine, includes dual head sealing feature as a standard feature. SingleHead feature allows interchanging Heating Element sealing widths. Standard sealing widths include: 1/4-inch, 1/2-inch and 1-inch.
 |
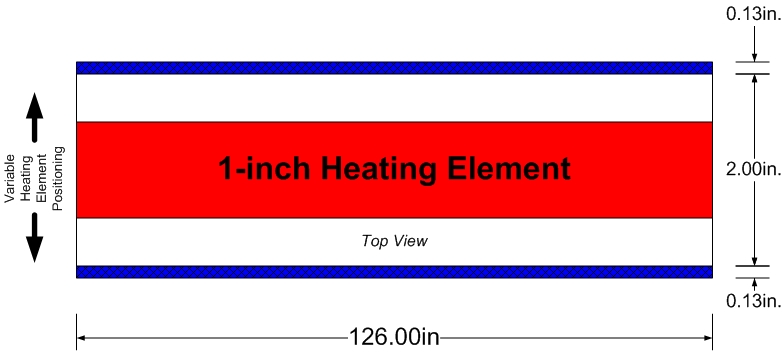
Referring to the illustration (above), the 1-inch (width) Heating Element was pre-installed and positioned on the Upper and Lower Sealing Bars. Positioning the location of the heating element is variable, and can be located anywhere within the 2-inch (front-to-rear) space. The hatched blue section shown above is the area we do not recommend locating the Heating Element. It is critically important that the location chosen for the Heating Element be exactly the same position (aligned) for Upper and Lower Sealing Bars. The only way to assure exact positioning is to activate Press with Heat Switch OFF, and visually compare Upper and Lower Heating Element positions. An offset will effect heatseal position on your product, however since Upper and Lower Heating Elements are not relied on together to affect the seal, position may be different for Upper and Lower Sealing Bars.
Please read all procedures and instructions before using the machine.
Operating Instructions
Power On Instructions:
Following these instruc tions will turn on the machine and ready the machine for heat sealing. tions will turn on the machine and ready the machine for heat sealing.
- Remove any debris from sealing area(s).
- Make sure all Control Panel switches are in their OFF position. Only exception is the ROCKER switch. For the most part, the ROCKER switch is always ON, except when maintaining the ROCKER. [Note. If ROCKER switch is OFF or no air is supplied to ROCKER, then the machine will not make a seal. There will also be an error message on the screen.]
- Make sure compressed air is connected to the machine.
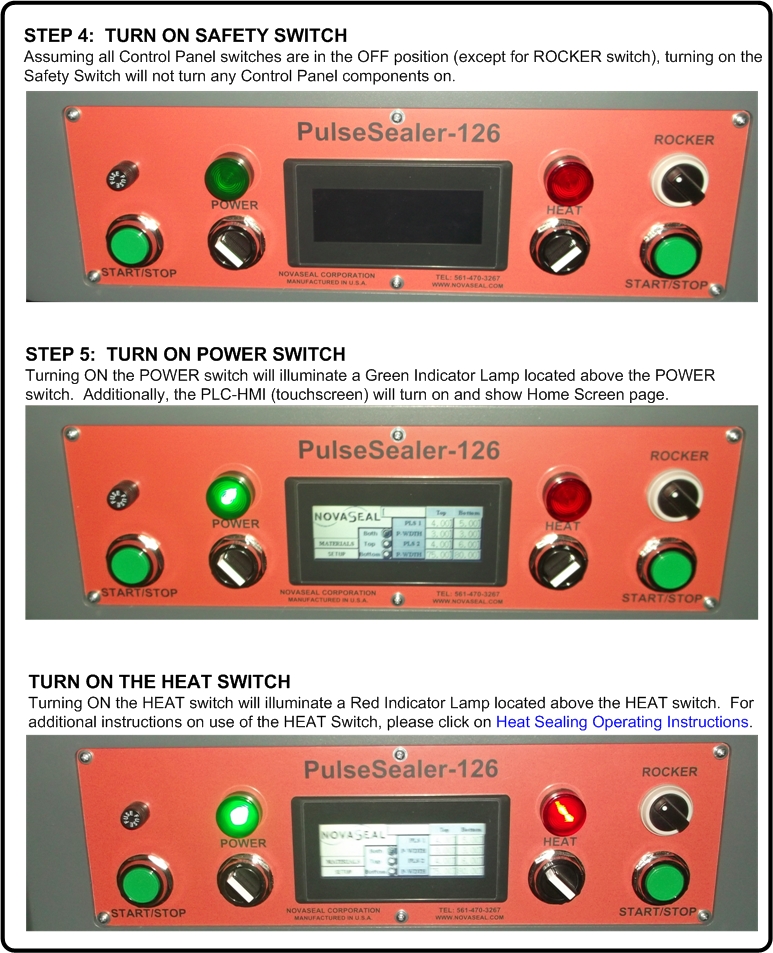
- Turn on the Safety Switch. To do this, move the power lever on the right side of the Safety Switch to the upper position. Doing this will supply electrical power to the machine. If lever can not move, make sure the Safety Switch is fully closed. Safety Switch applies power to the machine and power to the PLC (internal computer) and many internal components.
- Turn the POWER switch to ON position. This switch is a momentary switch which means that turning the switch clockwise will turn on power to the machine, the switch itself will revert back to its original position. When the POWER switch is ON, a Green Indicator Lamp above the POWER switch will illuminate. Additionally, when the POWER switch is ON, the PLC HMI (TouchScreen) also turns ON with Home Screen page showing. With only the POWER switch ON, no heat is on and heat sealing bars are safe to touch.
While the TouchScreen is on, you can adjust, change, modify or edit settings for the machine. Examples include: modifying parameter programming, selecting which or both Heating Elements are to be activated, selecting or deselecting PrePress component. Other buttons/switches include:
> START/STOP. Dual function switches. Used to sequence through programmed operations for heat sealing as well as to stop various sequeences.
> HEAT. Heat switch turns on the heat sealing heat. It may seem obvious that the HEAT switch should be on at all times, however to maintain the machine, there are times when you will want theo engage the press without sealing. Examples include replacing zone tape, adjusting sealing bar height, etc.
> Fuse. The fuse protects the electronics, specifically the PLC and HMI devices.
Power Off Instructions:
There are several different switcches that provide Power Off or Stop functions.
- START/STOP. START/STOP switch is a dual function switch. When pressed together (at the same time), this switch will sequence through heat seal operating steps, however when pressed individually, this switch will reset or stop heat sealing operation. It is not considered an emergency stop.

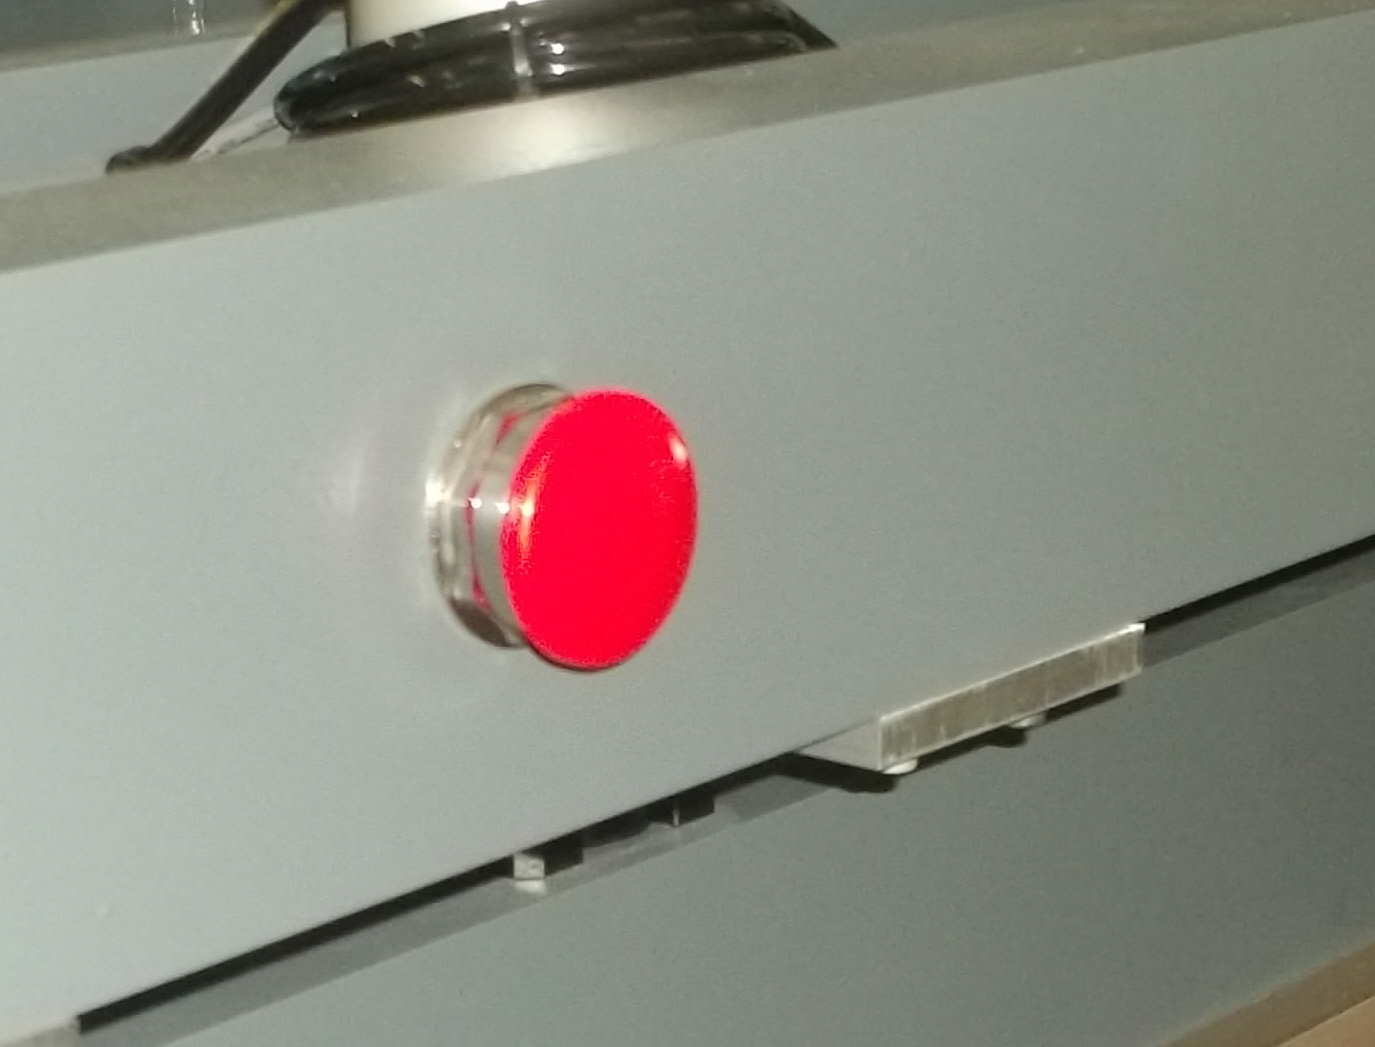
- E-STOP. RED Pushbutton E-Stop switches. There are two of these switches located on the front of the machine. Pressing either of the E-Stop switches will terminate sealing instantly, reset the machine and Power Down the machine, and can be used to shut off the machine as an alternate to the Safety Switch. To turn back on the machine after the E-Stop switch is activated, follow the instructions above for Power On Instructions. Please note that the E-Stop switch does not turn and can not be used to restart the machine.
- SAFETY SWITCH. Shutting off the Safety Switch will shut down electricity to the heat sealing machine. Using the Safety Switch to turn off the machine is only recommended when either the machine will be OFF for several days or when doing maintenance functions such as replacing Heating Elements.
|
|
Adjusting Heat Sealing Height:
Due to the nature of machine design for this application, the Upper Sealing Bar will never contact the Lower Sealing Bar. This design element assures that Heat Sealing height and compression are adjustable to accommodate a wide variety of board products. The following video defines the steps involved in changing the heat sealing height. Approximate time to change to any height is 5 minutes.
Heat Sealing Operating Instructions:
PulseSealing is the method used for heat sealing in this custom variation of a standard TableTop PulseSealer. Machine was designed for a single purpose function of heat sealing a vinyl strip to both sides of a board product. Each seal is considered independent and controls are programmed to seal either or both of the sides.
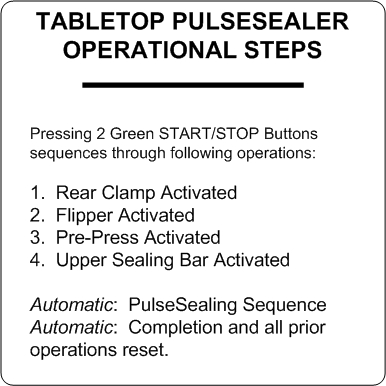
The Heat Sealing Operating Instruction video illustrates the recommended method in using the heat sealer to accommodate board seals. As shown in the inset to the right, steps are well defined and encoded into the programming. Pressing the two green START/STOP switches will sequence each step in the process.
Video shows board setup which starts with loading the board from the rear. Followed by locating the black plastic strip such that the seal is positioned correctly on both sides of the board. Next, the operator loads in the foam rubber. Then carefully pushes the board forward against the foam rubber and within the black plastic strip. Once in position, and if applicable, operator needs to locate one or two Teflon coated fiberglas filler boards on either exposed side.
With board setup completed, the each press of both START/STOP switches will sequence the remaining processes. Operations 1-4 will complete the heat sealing steps. Following the 4th step, the machine will automatically reset each of the components and be ready for next board.
|